
In this article, we go through the process of deploying a Buffalo application to a DigitalOcean Droplet using Docker images. We will utilize the Docker Compose Tool to manage the containers and Systemd to restart our application in case of failure.
Prerequisites
- You have developed a Buffalo application. I will be using theToodo example application.
- You have an account with DigitalOcean,
- You have created a DigitalOcean Droplet based on CoreOs Container Linux
- You are able to SSH into your Droplet.
- You have routed your domain to DigitalOcean. This will allow using the domain name instead of the IP address.
Introduction
Our deployment will comprise of three containers:
- Application container (Toodo)
- Database container (PostgreSQL)
- Web proxy container (Nginx)
We will follow the following steps:
- Verify our application builds without errors
- Verify that Docker Compose is installed in our DigitalOcean Droplet
- Create a Docker Compose file to manage our containers (docker-compose.yml)
- Create a Dockerfile for the the application (app.Dockerfile)
- Create script file (wait-for-postgres.sh) with commands to wait for the postgreSQL database to be ready before our application is launched.
- Create Nginx configuration file (nginx.conf) for proxying our application
- Create Nginx docker file (nginx.Dockerfile) which will copy updated configuration file to the container.
- Create Systemd file (toodo.service)
- Create a script (build-and-upload.sh) will be used for building the images and uploading required files to our DigitalOcean droplet.
- Run the build and upload script
- Test that we can run and work with the Toodo application
Set Up Toodo Application
From the Terminal window we clone, install dependencies and build the application by running the following commands.
git clone --depth=1 https://github.com/gobuffalo/toodo.git $GOPATH/src/github.com/gobuffalo/toodo

cd  $GOPATH/src/github.com/gobuffalo/toodo

yarn install

buffalo build

git checkout -b do-deploy
We will not be using SSL in this deployment. We therefore comment out the ForceSSL middleware in actions/app.go
// Automatically redirect to SSL
// app.Use(ssl.ForceSSL(secure.Options{
// 	SSLRedirect:     ENV == "production",
// 	SSLProxyHeaders: map[string]string{"X-Forwarded-Proto": "https"},
// }))
Install and Verify Docker Compose on DigitalOcean Droplet
CoreOS Container Linux on DigitalOcean has Docker installed but it does not ship with Docker Compose Tool. We therefore have to install Compose from the Github repository.
SSH into your Droplet and run the following commands:
sudo mkdir -p /opt/bin

sudo curl -L --fail https://github.com/docker/compose/releases/download/1.21.2/run.sh -o /opt/bin/docker-compose

sudo chmod +x /opt/bin/docker-compose

docker-compose --version
/usr/local/bin/ is readonly on CoreOs and this is the reason we are installing to /opt/bin. You can also replace 1.21.2 to a version of your liking or the latest version.
Docker Compose File
Let’s start by creating the Docker Compose file (docker-compose.yml) in the project roor directory.
version: '3'

services:
  db:
    image: postgres:10-alpine
    container_name: pg_db
    environment:
      POSTGRES_USER: postgres
      POSTGRES_DB: toodo-db
      POSTGRES_PASSWORD: ${POSTGRES_PASSWORD}
    ports:
      - 5432:5432
    restart: always
    # Un-comment the following two lines if you want data to persist across containers
    # volumes:
    #   - pg-data:/var/lib/postgresql/data

  toodo-app:
    depends_on:
      - db
    image: toodo
    container_name: toodo-app
    restart: always
    environment:
      - SESSION_SECRET=${SESSION_SECRET}
      - DATABASE_URL=${DATABASE_URL}
    ports:
      - 3000:3000

  web:
    depends_on:
      - toodo-app
    image: nginx
    container_name: nginx
    restart: always
    ports:
      - 80:80
      - 443:443

volumes:
  pg-data:
Create Environment Variables Script Generator
In docker-compose.yml file, environment values are being read from an .env file. So let’s create the script file.
#!/bin/bash
# create-env.sh

sess_secret=$(uuidgen)
uuid=$(uuidgen)
db_passwd=${uuid:0:12}

echo -e SESSION_SECRET=${sess_secret} > dep.env
echo -e DATABASE_URL=\"postgres://postgres:${db_passwd}@pg_db:5432/toodo-db?sslmode=disable\" >> dep.env;
echo -e POSTGRES_PASSWORD=${db_passwd} >> dep.env;
@pg_db is the host value and this refers to the db service within the docker compose file.
Assign execute permissions to the script file:
chmod +x create-env.sh
Create Application Dockerfile
In the root of the project, create the application docker file app.Dockerfile
FROM alpine
RUN apk add --no-cache bash && apk add --no-cache ca-certificates && apk add --no-cache postgresql-client

WORKDIR /bin/

COPY toodo .
COPY ./wait-for-postgres.sh .
RUN chmod +x wait-for-postgres.sh

ENV GO_ENV=production

ENV ADDR=0.0.0.0

EXPOSE 3000

CMD /bin/wait-for-postgres.sh; /bin/toodo migrate; /bin/toodo
Create Wait For PostgreSQL Startup Script
Before our application starts up, we make sure that PostgreSQL is running and can accept commands by creating wait-for-postgres.sh script file having the following commands:
#!/bin/sh
# wait-for-postgres.sh

# Script lifted from
# Using Docker Compose Entrypoint To Check if Postgres is Running
# https://bit.ly/2KCdFxh
# Author: Kelly Andrews

set -e

cmd="$@"

# service/container name in the docker-compose file
host="db"
# PostgreSQL port
port="5432"
# Database user making commection
user="postgres"

# pg_isready is a postgreSQL client tool for checking the connection
# status of PostgreSQL server
while ! pg_isready -h ${host} -p ${port} -U ${user} > /dev/null 2> /dev/null; do
   echo "Connecting to postgres Failed"
   sleep 1
done

>&2 echo "Postgres is up - executing command"
exec $cmd
Assign execute permissions to the script file:
chmod +x wait-for-postgres.sh
Nginx Dockerfile and Configuration
Create nginx.conf file with the following contents:
user  nginx;
worker_processes  1;

error_log  /var/log/nginx/error.log warn;
pid        /var/run/nginx.pid;

events {
    worker_connections  1024;
}

http {
    include       /etc/nginx/mime.types;
    default_type  application/octet-stream;

    log_format  main  '$remote_addr - $remote_user [$time_local] "$request" '
                      '$status $body_bytes_sent "$http_referer" '
                      '"$http_user_agent" "$http_x_forwarded_for"';

    access_log  /var/log/nginx/access.log  main;

    sendfile        on;
    #tcp_nopush     on;

    keepalive_timeout  65;

    #gzip  on;

    upstream toodo-app_server {
        server toodo-app:3000;
    }

    server {
        listen 80;
        server_name toodo.deitagy.com;

        # Hide NGINX version (security best practice)
        server_tokens off;

        location / {
            proxy_pass       http://toodo-app_server;
            proxy_redirect   off;
            proxy_set_header Host              $http_host;
            proxy_set_header X-Real-IP         $remote_addr;
            proxy_set_header X-Forwarded-For   $proxy_add_x_forwarded_for;
            proxy_set_header X-Forwarded-Proto $scheme;
        }

    }
}
The modificatons made to the configuration file will forward any root requests (http://toodo.deitagy.com) to the toodo-app service defined in the docker-compose.yml file. That service is our app which will be listening on port 3000 ready to serve responses.
Create the Nginx Dockerfile (nginx.Dockerfile) which will be used to replace the default nginx configuration file in the nginx container.
FROM nginx:1.15-alpine

COPY nginx.conf /etc/nginx/nginx.conf
Create Build and Upload Script
Create the script file (build-and-upload.sh) that we will always be executing to build and upload our images.
#!/bin/bash
# build-and-upload.sh

readonly app=toodo
readonly app_image=toodo:latest
readonly app_docker=app.Dockerfile

readonly nginx_image=nginx:latest
readonly nginx_docker=nginx.Dockerfile

readonly bzip_file=${app}-latest.tar.bz2

readonly app_key="~/.ssh/toodo-ssh"
readonly app_domain_user="core@toodo.deitagy.com"

clear

# Remove image and ignore 'image does not exist' error
echo "Building app and images ..."
docker rmi -f ${app_image} 2>/dev/null
env GOOS=linux GOARCH=386 buffalo build -o ${app}
docker build --no-cache -t ${app_image} -f ${app_docker} .
rm ${app}

docker rmi -f ${nginx_image} 2>/dev/null
docker build --no-cache -t ${nginx_image} -f ${nginx_docker} .

echo "Creating deployment .env file..."
./create-env.sh

echo "saving docker images ..."
docker save ${app_image} ${nginx_image} | bzip2 > ${bzip_file}
ls -lah ${bzip_file}

echo "uploading images to the server ..."
scp -i ${app_key} ${app}-latest.tar.bz2  docker-compose.yml dep.env ${app_domain_user}:/home/core

ssh -i ${app_key} ${app_domain_user} << ENDSSH
cd /home/core
bunzip2 --stdout ${bzip_file} | docker load
rm ${bzip_file}
mv dep.env .env -f
docker-compose down && docker-compose up -d --force-recreate;
ENDSSH
From the Terminal window, make the script to be executable:
chmod +x build-and-upload.sh
Testing Our Deployment
From the Terminal window, run the following command to build and upload our images to DigitalOcean:
./build-and-upload.sh
The script will display messages during the build and upload process.
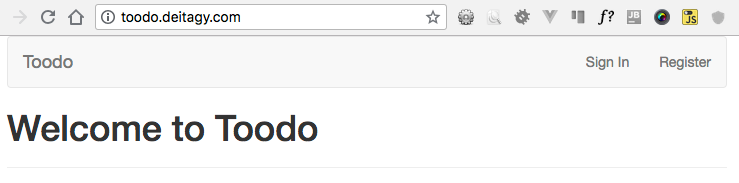
After the process completes, open your browser and navigate to http://toodo.deitagy.com/ (replace http://toodo.deitagy.com/) with your own url. The welcome to Toodo should load with options to Register or Sign-In
Setup Systemd Service
If your Droplet was to restart, your application will no longer work. To make sure that your application will always be available, you need to setup a Systemd service for your application. You can refer to the Buffalo docs on the steps of how to configure your application systemd service.
Resources
I found the following posts to be really useful in coming up with this post:
- Blueprint for deploying web apps on CoreOS
- Using Docker Compose Entrypoint To Check if Postgres is Running
- Using Variables in Docker Compose files
You can Let’s continue with discussions and comments on Medium